I find myself talking about my process quite a lot in this blog, but there really is no substitute for a good old visual. So below is how I typically approach things. I’ll annotate as I go to fill in any gaps.
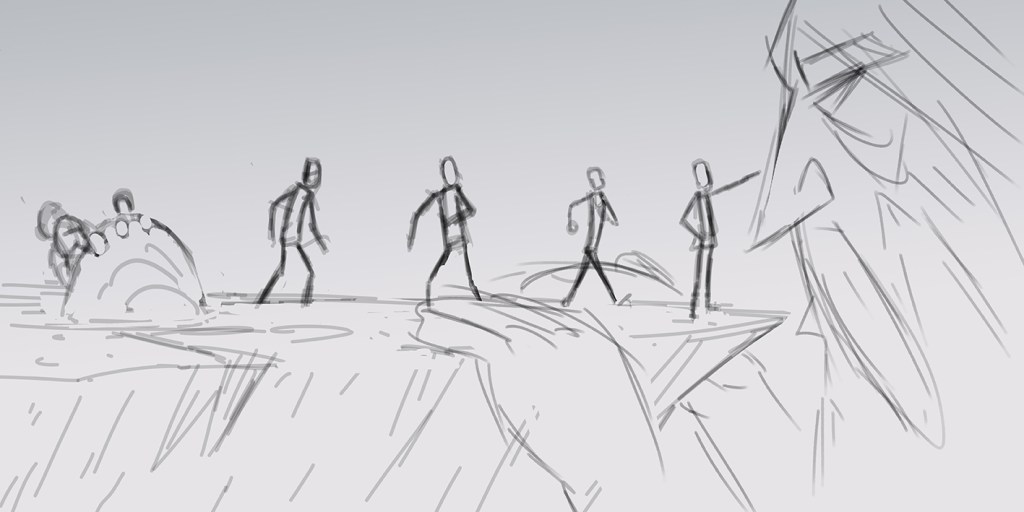
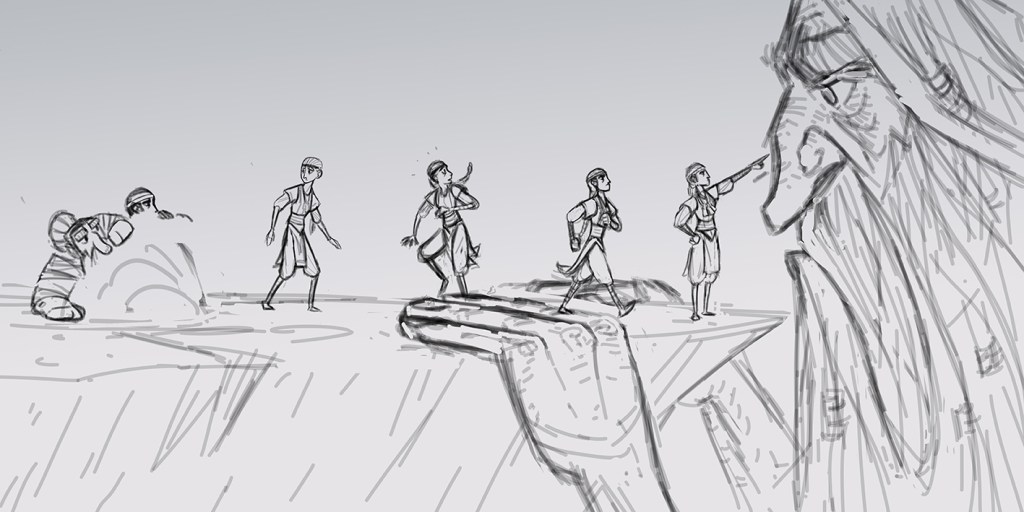
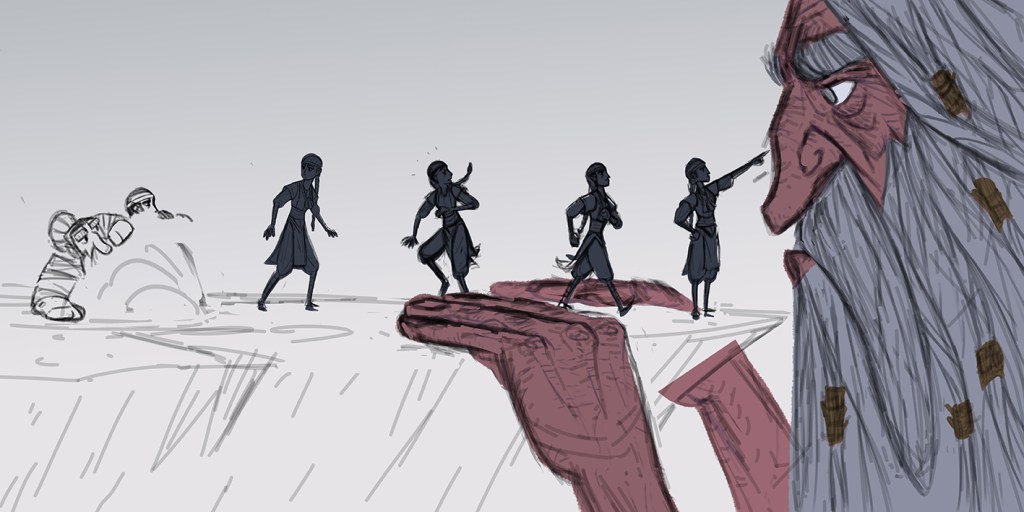
Step 1: (I’ve already jumped ahead here. There’s actually a stage before this where I will draw any ideas I might have for an illustration really loosely in a sketch pad. These are often nothing more than scribbles that you would be hard pressed to decipher, but they help with working out the composition). Ok, so basic character gesture drawings, very little detail. This step is purely the scaffolding that the rest of the illustration will be built around. Step 2: Refining the line work and adding detail to the characters. This can be pretty time consuming at the best of times, but even more so when you have multiple characters, and often requires a lot of rescaling and erasing. Step 3: Blocking-in. This is where I simply create blocks of shapes for the the largest shapes and characters (the background should be blocked in here as well). The block of colour creates a silhouette which all other colours are layered over later.Step 4: I’ve combined two steps here. 1 – specific areas of colour are added such as skin, hair, clothing etc… 2 – line work is further refined and coloured appropriately. Step 5: Final touches. This step can involve a variety of processes from adding texture and lighting to hand lettering and adjusting colour/contrast levels. For this piece I added some light and shadow overlays to the characters to give the scene and sunrise aesthetic, as well as more obvious additions such as clouds and text.
And that’s pretty much it! Hopefully that gives you some insight in to how I do things.